| Late last year the power window on my 1987 Mercedes 560SEL stuck in the down position. I lowered the window to exit a parking station and the window would not go back up. The first test I did was to check the switch. This would have been the easiest and simplest repair. It is very easy to swap the plug on the front and rear switches, but unfortunately I was able to rule out the switch. At that point I was preparing the 560SEC for the concours run and the 300TE for the Tasmania trip, so I parked the 560SEL to look at after those events. I assumed that the problem was going to be a broken plastic slide in the window regulator. This is a very common problem on the W126. I was so sure this was the issue that I bought a couple of these slides online. 
Earlier this year, I finally removed the door trim and the slide was in perfect condition. Removal of the W126 door trim is wel documented, but there are a few gotchas. The first is that the trim should never be pulled outward until it is pulled up and plastic hooks are clear of the door. They will break otherwise. Secondly, there is a tiny plastic circlip in the electric seat switch. This is often missing, but was still present on my car. All the other doors I’ve removed the trim that had power seats were missing that circlip. 
I couldn’t see any obvious issue other than the window being stuck. At this point I was preparing for a couple of work trips, so I took the car to a mechanic to take a look at it. He removed the regulator and diagnosed a bad window motor. He showed me how the plastic gear inside the motor was binding up preventing the motor from working. Enter the 420SEL parts car. I removed the motor from the front drivers side. The other motors are different and have different part numbers. The parts car motor looked a bit manky but it did work. I cleaned it up as best I could and dropped it off. 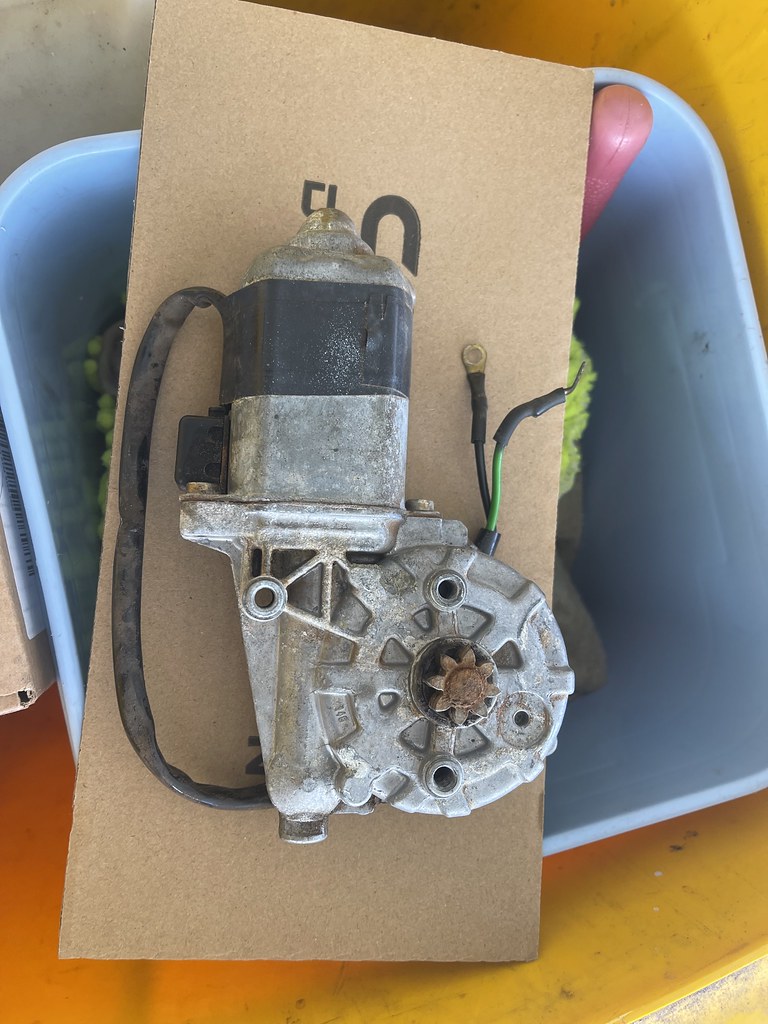
The parts car motor did the trick and I got the car back with a working window. My job was to put the trim back on. The first part was replacing the moisture barrier. The original one had a few rips in it, so my daughters and I made a new one from some plastic sheet, using the old one as a template. 
As well as the moisture barrier, I also replaced the pot metal bracket that goes around the door pull, and exchanged the door pull with one with slightly less play in the mechanism. The door pulls from the rear doors are the same and are generally less floppy. The metal bracket was broken as can be seen. 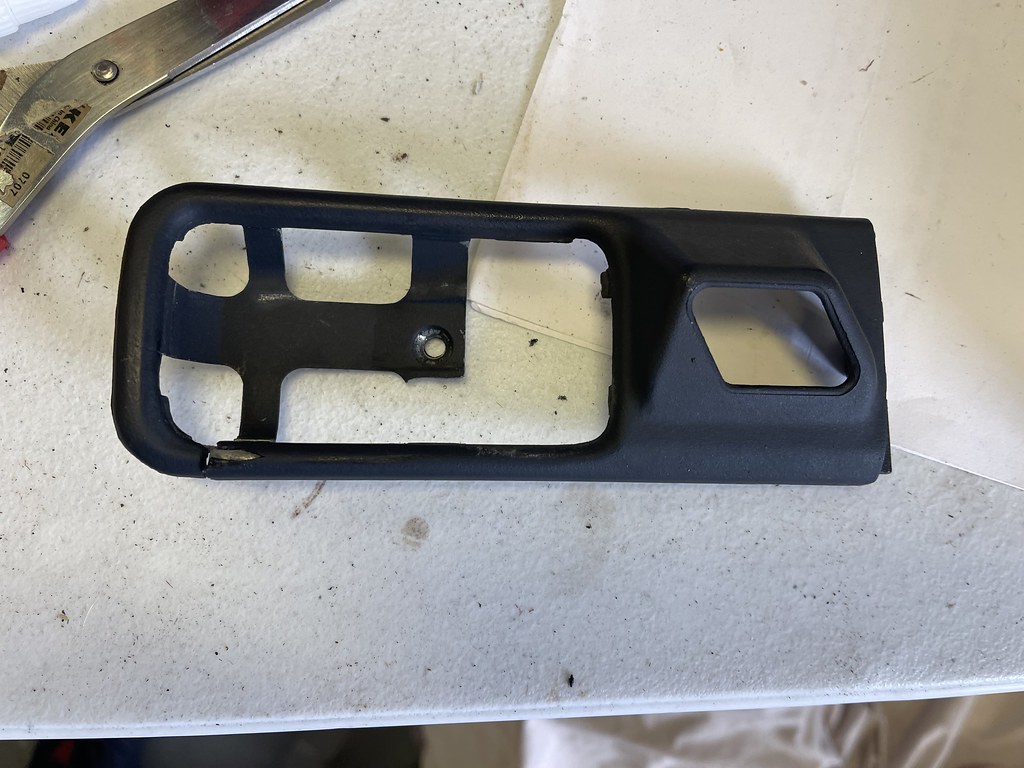 The main trick with getting the door trim on is to remove the little trim strip that goes alongside the window aperture. It is held in with a single screw and then it lifts upwards and away. This allows the top of the door trim to better fit into the channel near the window. The main trick with getting the door trim on is to remove the little trim strip that goes alongside the window aperture. It is held in with a single screw and then it lifts upwards and away. This allows the top of the door trim to better fit into the channel near the window.
The puddle light is also a bit of a pain as once its connected you need to keep the door trim near the door. From there the job is fiddly but not all that hard. The main thing is not breaking any of the clips when re-attaching the trim. 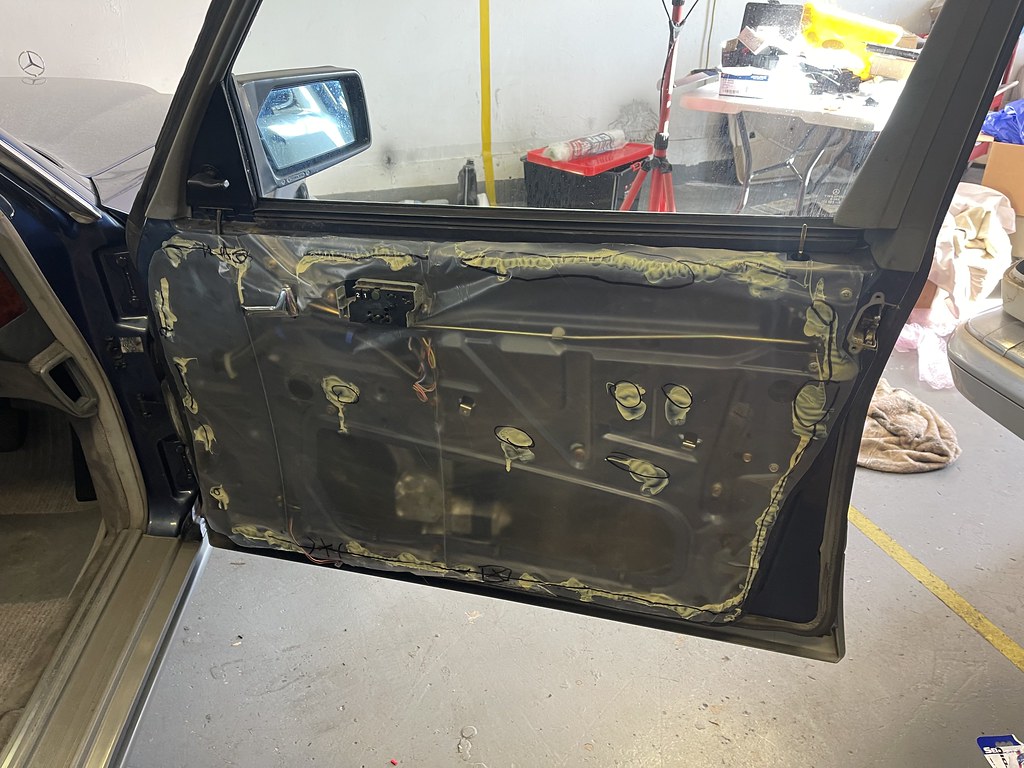 It’s been good to have the 560SEL back and operational. I’ve been driving it pretty much daily for the last week. It’s been good to have the 560SEL back and operational. I’ve been driving it pretty much daily for the last week.
A few months ago, I started replacing the blower on my W124. I figured this would be a simple job and I would be back up and running a few days later. Little did I know that that the car would be off the road for months. In part one, I removed the old W124 blower motor. I was not able to install my replacement motor, because it did not fit. I figured the issue was with the aftermarket part, so I ordered a brand new genuine W124 blower motor. 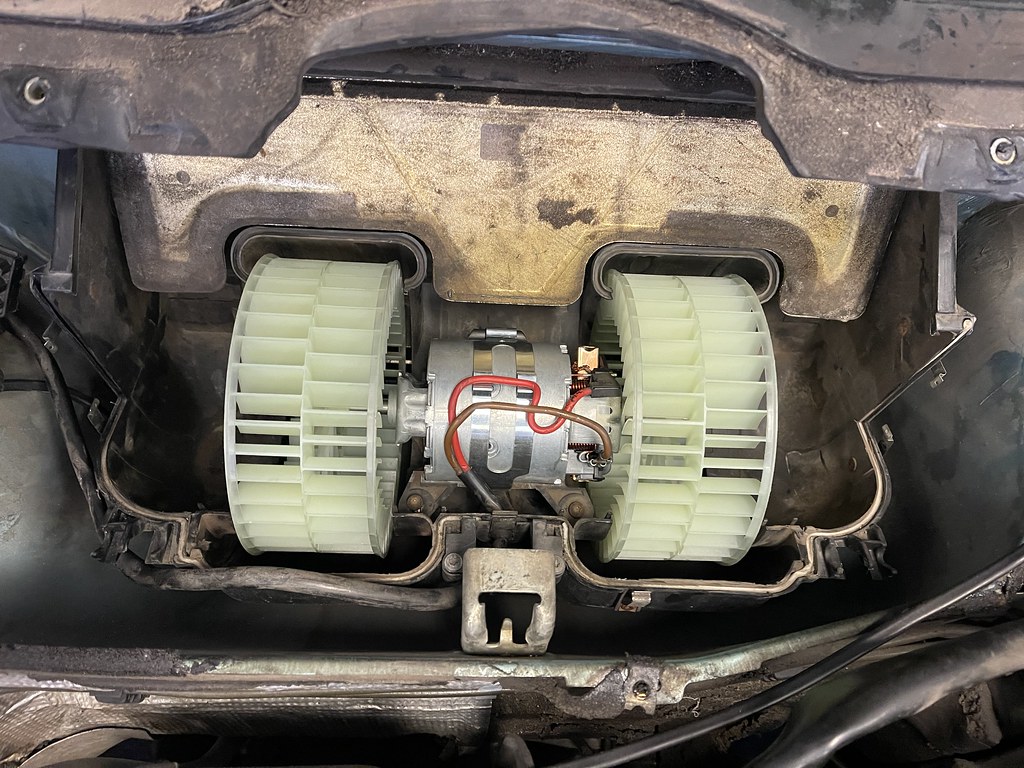
This arrived, and it was much better, but still not a perfect fit. It was still scraping on the housing somewhat. I spent a lot of time trying to get it to work without scraping. After trial and error, I found that the original bracket worked better than the one that came with the aftermarket fan, especially after trimming a little material from it. I also used only two of the three screws holding it on, with the rightmost screw very tight and the leftmost screw missing. With a lot of pushing and prodding I was eventually able to make it run with minimal scraping. The right squirrel cage really needed to be about 50mm further to the right. I found the easiest way to do it was to leave the fan running while I did the re-assembly. That way I knew right away of something I did made the fan scrape again. This was particularly important when putting the lid on the housing and re-fitting the mono-wiper. I found sometimes I had to push on the housing again to stop the scraping. I hope that does not mean issues going over every bump or a sharp corner. 
Getting the mono-wiper back on was quite fiddly. When I removed it, I had left the wiper blade on. In retrospect this was rather silly and it was much easier with the blade removed. I found it was easiest to position the fan motor first from the bottom, plug in the connector then position the assembly. There are four nuts plus the clip that go on to secure the mono-wiper. Two of the nuts are not easy to see, obscured by the rubber trim around the wiper base. I also used a little grease on the joints of the wiper mechanism, at least those that were visible from the rear of the assembly. Once I had the mono-wiper back on, I realized that the flap at the top of the blower motor was down. I was pretty sure this was up when I first started this install. Sure enough, it was. This didn’t seem to be right, so I removed the mono-wiper and the top of the housing. 
It turns out there is a linkage between the flap and a pivot point behind it. I’m not sure if the linkage was broken, or had just come off, but I could not get it back on. At this point I really wanted to get the car back on the road, so I left the flap in the halfway position and re-installed the W124 blower motor cover and the mono-wiper. I had just wasted two hours. Getting the rest of the trim back in wasn’t too bad. The trim on my car is not in the best of shape in a few places, especially the lining of the inner firewall. I would love to get some better parts from a wreck at some point. Having the 420SEL parts car was quite a big help here. I was able to replace a few nuts and screws that were missing (or I dropped). 
I was also able to clean out some water drains that were totally blocked up. In one area, I didn’t realize there was supposed to be a drain it was so blocked up. I didn’t have time to take the car for a test drive, but everything is now back in and ready to go except for the wiper blade. I’m glad this job is finally done, and I can use the 300TE again. 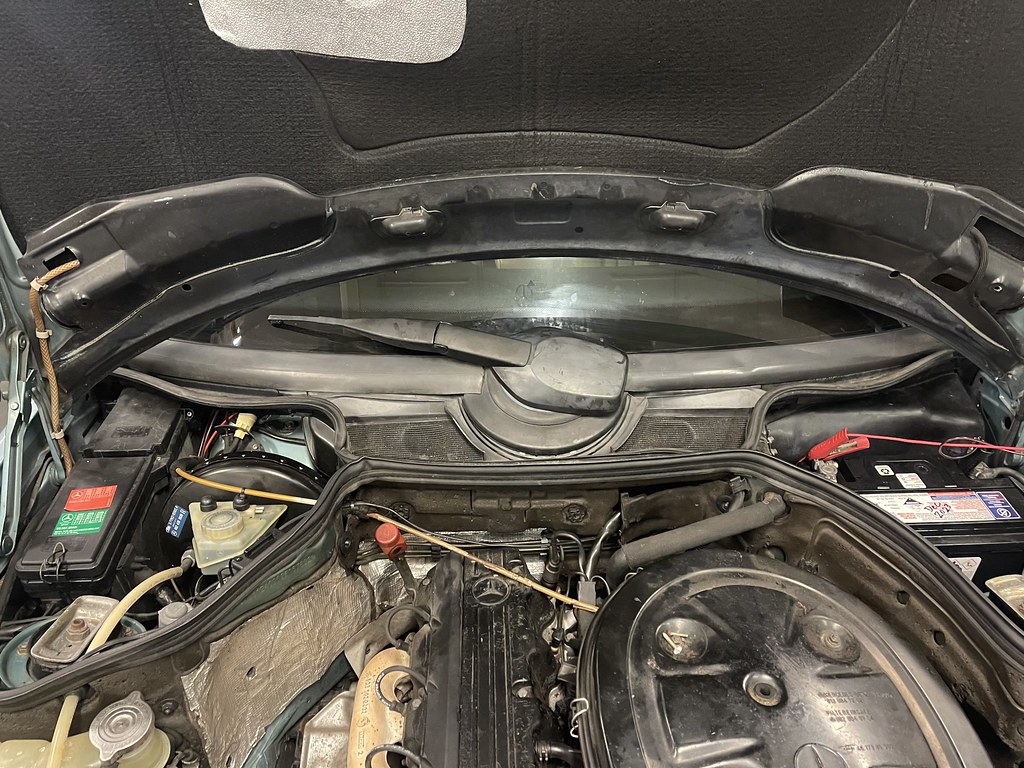
I’m back in the USA for an annual conference I attend. I normally have a free day before it starts, to get acclimatized to the time zone and to allow a buffer for flight delays. The conference is in Las Vegas, which has become really expensive. I’m not all that interested in spending money on overpriced entertainment, or gambling when I could spend money on needy old cars. Thus, I headed back out to the self service junkyard. 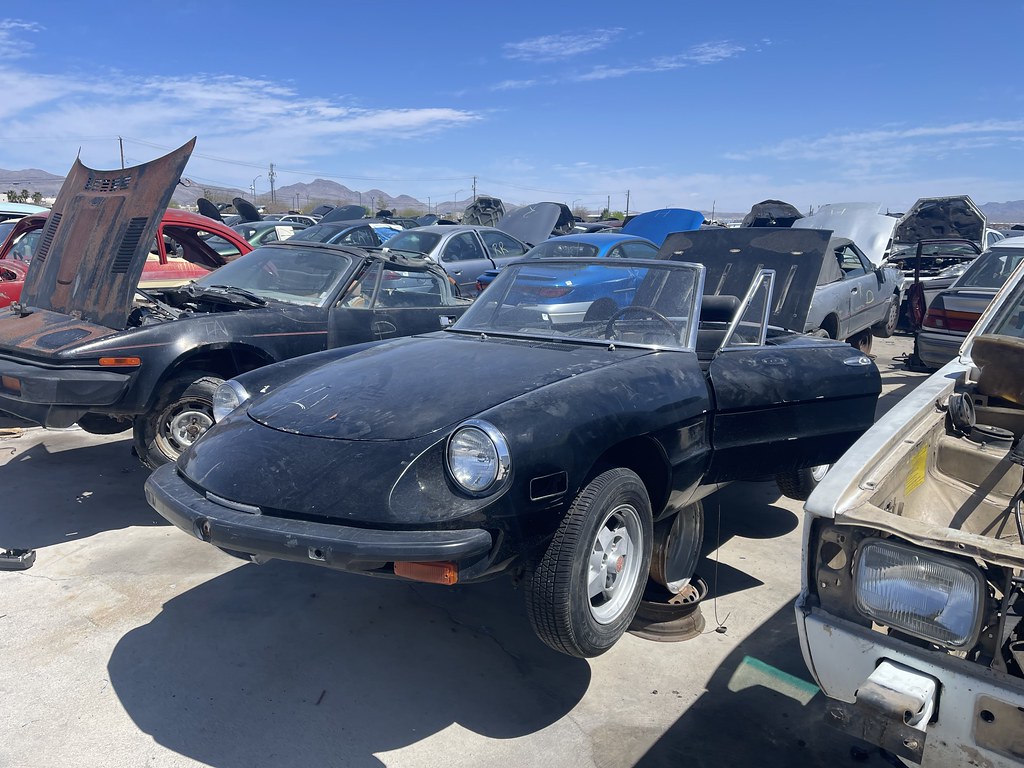
This year I didn’t think I would end up going. A few days before my trip, I checked the inventory at both Junkyards I use in Vegas. The oldest car was a 1992 190E. My luck changed though, and a 1991 300E and a 1986 560SEL were both added to the list. That meant not only were there two good models for me, but both would be not too picked over. I did my usual thing and bought some tools and took an uber out to the location. On the way to the Mercedes, I passed a Alfa Romeo Spider and a Jaguar XJS V12. Not normally cars one sees in the self service junkyard. 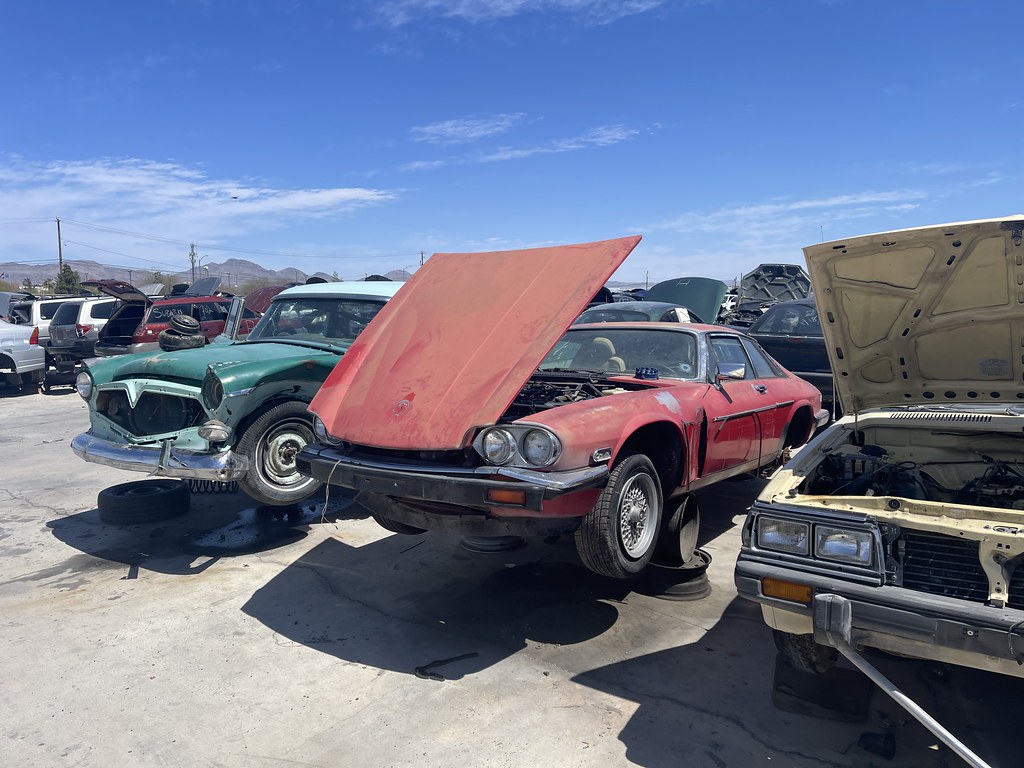
In the Mercedes-Benz section the most common car was the W220 this time. However, the W126 and W124 were next to each other. The W126 was in much better shape than the W124. While the paint was faded, the interior was actually quite nice still. Somewhat sun damaged, but still quite nice. The 300E looked like it had been neglected for 20 years. 
The 560SEL was a very early one. I looked up the data card (WDB1260391A19661) and it was produced 9/85. Series 2 started in August with #186069. This 560SEL had engine number #000196, showing how early it was. I had read the change to Series 2 did not all happen at once, and this car confirmed that. While it was basically a series 2 car, it had a series 1 rear parcel shelf. It also had the fanfare horn button on the console as do 1986 models. The car was in a striking combination of Anthracite (172U) with Anthracite leather (271). This combination would have never been ordered by an Australian dealer unless the customer insisted. 
My criteria for getting parts is that they need to be easy for me to carry and put in my luggage. Therefore, an original alloy wheel in the spare wheel area of the 560SEL was not on the cards. The most obvious and easily flipped parts were already gone, sine the car had been there a week. Still, there was quite a lot I could get. Probably nothing especially exciting, but for the cost all good spares to have on hand. Some of it was similar to what I was able to get last year. Since I just used up my spare drivers side window motor on my 560SEL, I grabbed the passengers side unit from the parts car here. I also got lots of useful switches and relays that are great to have on hand. While I now have other SLS spares, it can never hurt to have more at these prices. So I set about removing the SLS. Since I had to remove the rear seat, I grabbed the seat motor too. 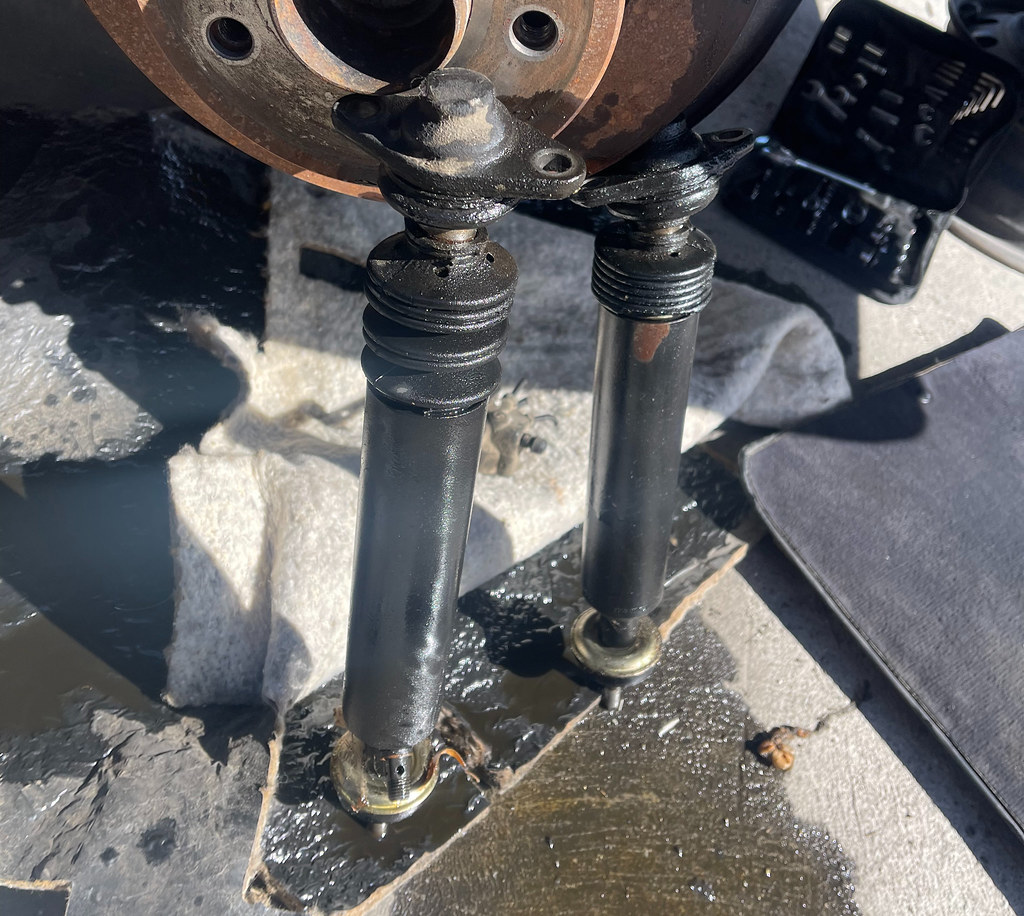
The SLS proved more difficult than anticipated, I was able to return early the next morning with a 17mm ring spanner and finalize the removal before I had to start work. I’m getting quite fast at stripping SLS struts from wrecks. I also took the chrome strip for the boot of the 560 as mine is a bit discoloured, This one is not perfect but it looks a little better. 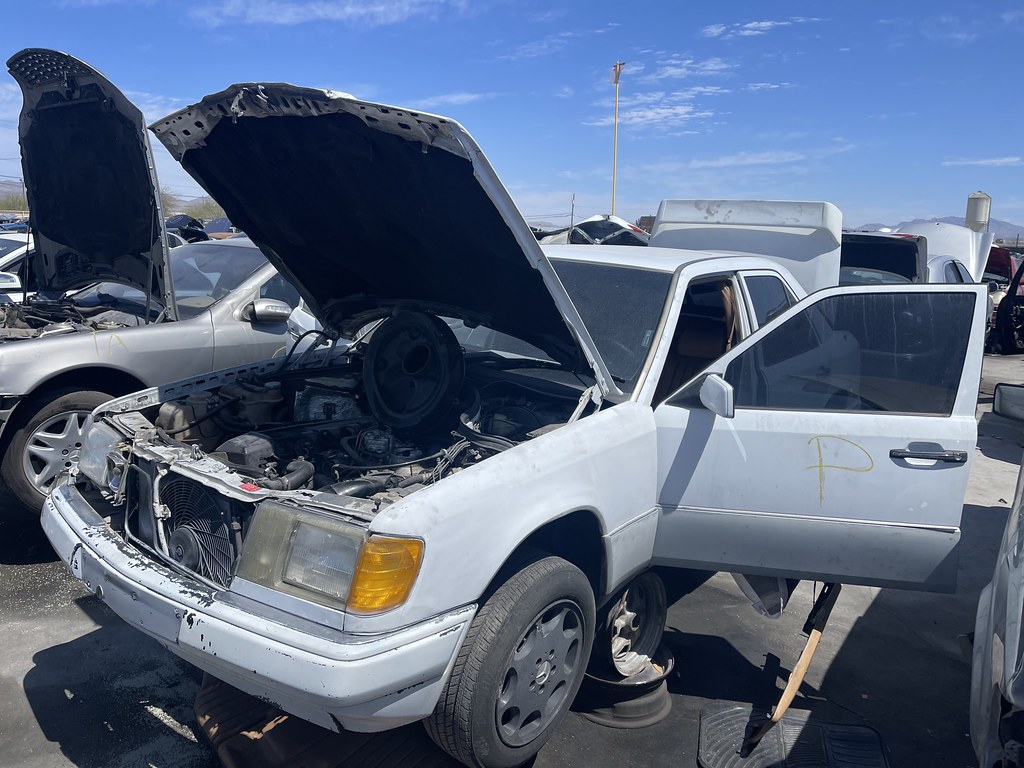
On the W124, I took the comfort control module from under the seat and a few small misc items, such as a couple screws that are missing on my car for the mono wiper. I didn’t bother getting any switches as they were so badly sun damaged. The Hirschmann antenna came from the W124 too. 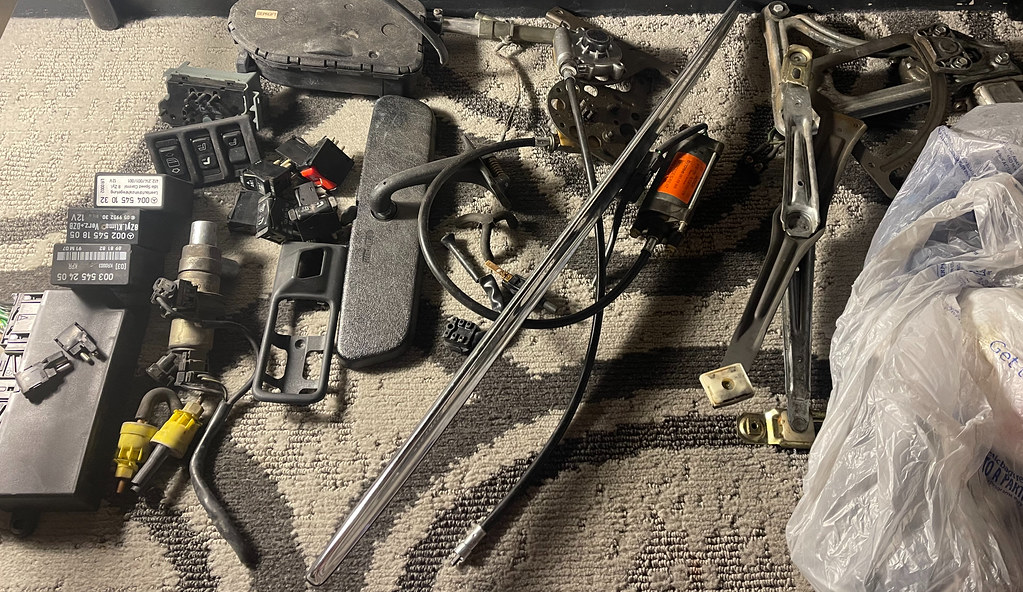 if I go again next year, I hope they have more W124s. Its too much to hope that there will be older cars, but while I now have a good supply of W126 parts, I would like to build up my stock of W124 parts. The picture above shows some of the parts. The SLS parts are very greasy, so in the plastic bags. if I go again next year, I hope they have more W124s. Its too much to hope that there will be older cars, but while I now have a good supply of W126 parts, I would like to build up my stock of W124 parts. The picture above shows some of the parts. The SLS parts are very greasy, so in the plastic bags.
I just got my 450SLC back from having the timing chain, tensioner, camshaft oiler tubes and valve stem seals replaced. These are all jobs that any owner of a Mercedes V8 of this era will need to undertake at some point. The primary driver behind this was the need to replace the valve stem seals. A couple of my sparkplugs, #1 in particular, would regularly foul up. I didn’t have a lot of visible smoke, but I did see the odd puff of smoke taking off after a period idling. This is a pretty common problem in these engines. Age, and lack of use cause the valve stem seals to harden and allows oil to get into the cylinders, in particular at idle. A number of these engines have been prematurely rebuilt due to this simple issue. It also seemed sensible to change the timing chain at the same time. I understood that it had been done a year or so before I bought the car in 2003. I didn’t have any evidence for this. Removing the valve covers showed that the chain had been replaced at some point, as had the guides. However, I wasn’t sure the age of the chain and the guides were now coffee coloured. I started by ordering the parts I would need. The part numbers I ordered are listed below. I don’t guarantee these are correct for any other car. For a lot of these parts I prefer genuine given their importance to the engine and how expensive this job is. 
- Timing chain – 000 997 76 94 – IWIS (In a Febi Box)
- Timing chain tensioner – 117 050 10 11 – Genuine. This is the tensioner with the port for air injection. It is quite expensive. The air injection system on my car has been disabled and it was not clear to me if I could have simply used the normal tensioner.
- Camshaft oiler tube kits x2 – 117 180 00 84 – I wanted genuine, but they are now NLA so purchased Febi.
- Chain guide x2 – 117 052 09 16 – Genuine
- Chain guide x2 – 117 052 08 16 – Genuine
- Tensioner guide – 117 050 04 15 – Genuine
- Guide pin – 116 052 21 74 – got a couple in case they were needed, but they can normally be reused.
- Left valve cover gasket – 116 016 13 21 – Elring
- Right valve cover gasket – 116 016 14 21 – Elring
- Valve cover copper sealing ring x8 – 915035 000016 – Reinz
- Valve stem seal kits x2 – 116 050 01 67 – Genuine
While I was there I also ordered some other parts I needed that will be used later, such as the drier pictured above. I also grabbed the two pictured air hoses to be replaced at the same time as they were rock hard. There were no major issues during the job, although my mechanic noted that the valve stem seals are much harder to do in the 107 than the 126. There is far less room, particularly up near the brake booster. The oil seals immediately showed why I had an issue with oil getting into the cylinders A couple had cracked and the rest were so hard they were not sealing properly. 
It would appear that Mercedes-Benz revised these seals at some point. The new ones were rubber, whereas the old ones were a hard plastic type material. During the timing chain job, a couple of the lifters need replacement. Unlike during the timing chain job on my 560SEC, none of the guides were broken, but they were all discoloured. It is not clear how many kilometres were on my chain, but the camshaft sprockets had a reasonable amount of wear on them.  After the job, my mechanic performed a compression test on my engine and he was very happy with the results, even after 313,000km. The car runs very well now, and seems to even have a little more power. This was quite an expensive job, but necessary if you are going to own a Mercedes-Benz v8 of this era. After the job, my mechanic performed a compression test on my engine and he was very happy with the results, even after 313,000km. The car runs very well now, and seems to even have a little more power. This was quite an expensive job, but necessary if you are going to own a Mercedes-Benz v8 of this era.
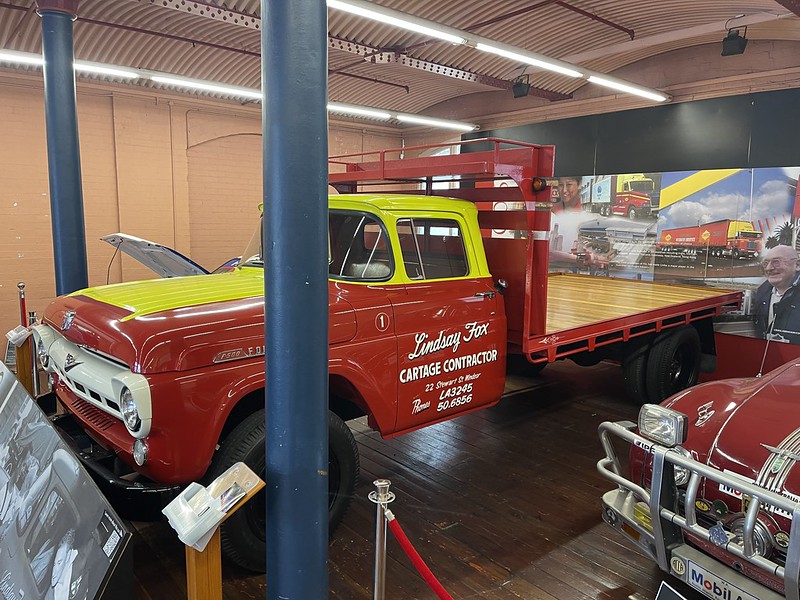
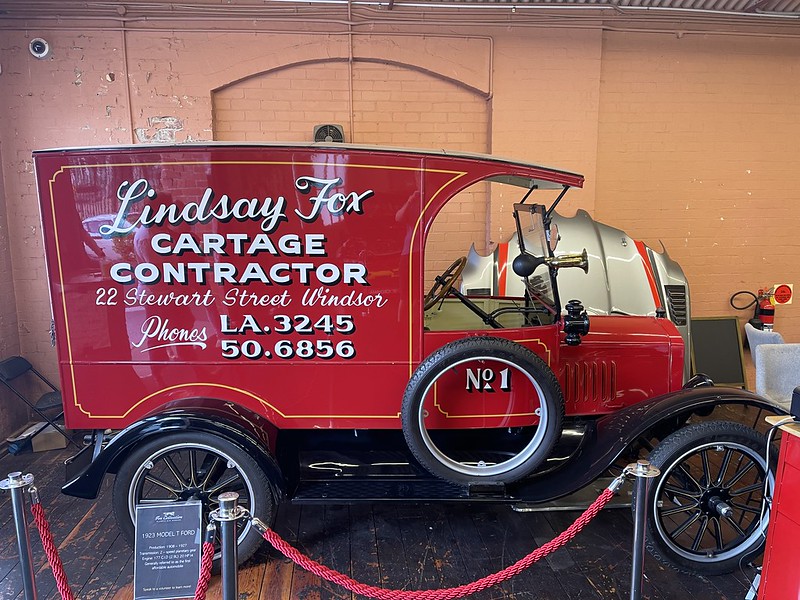
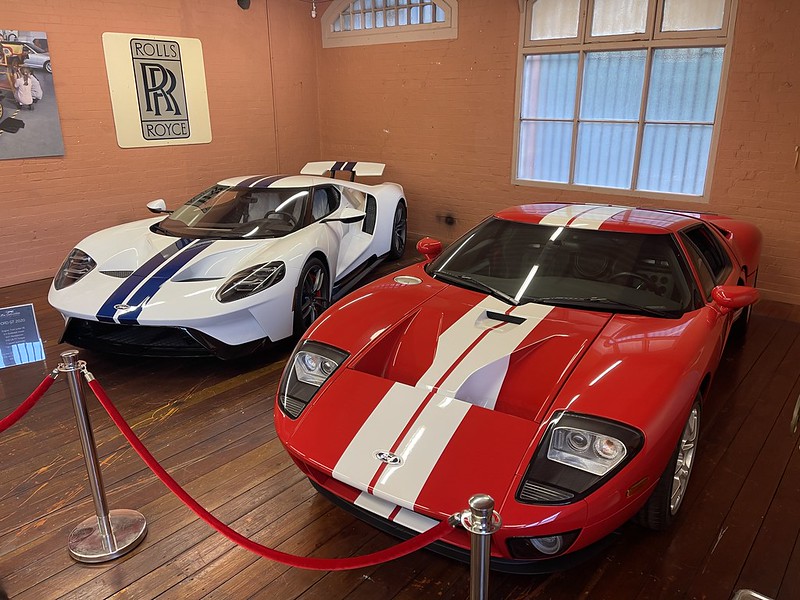
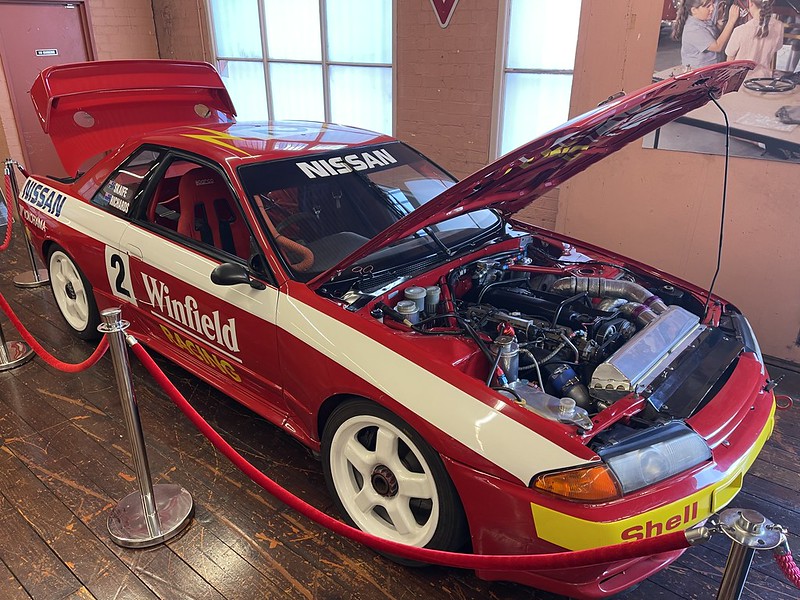
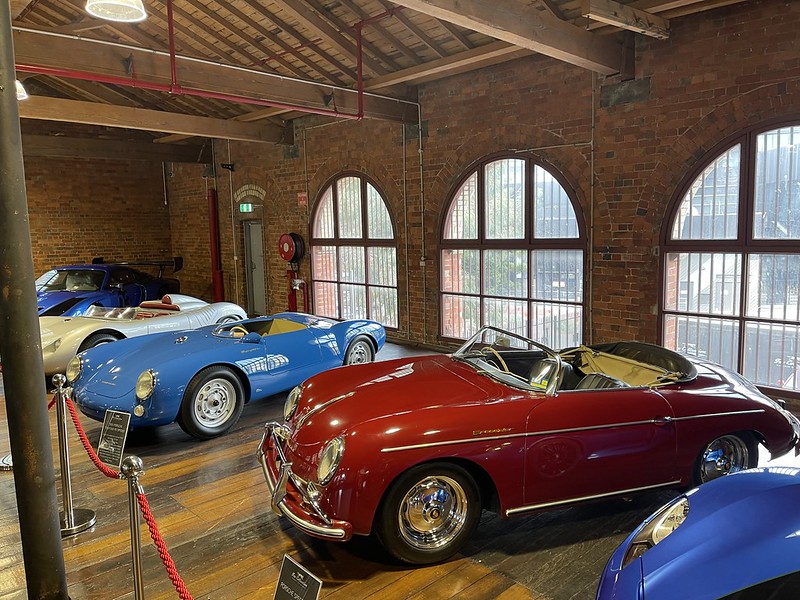
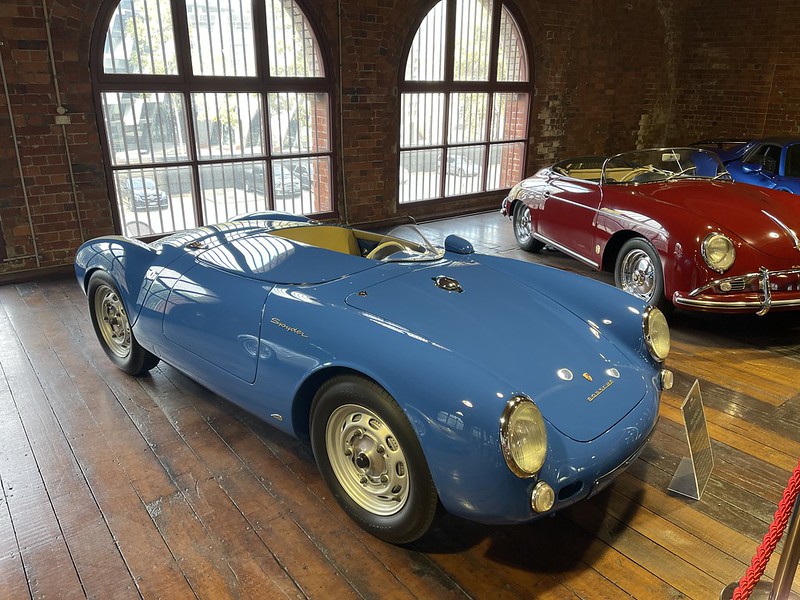
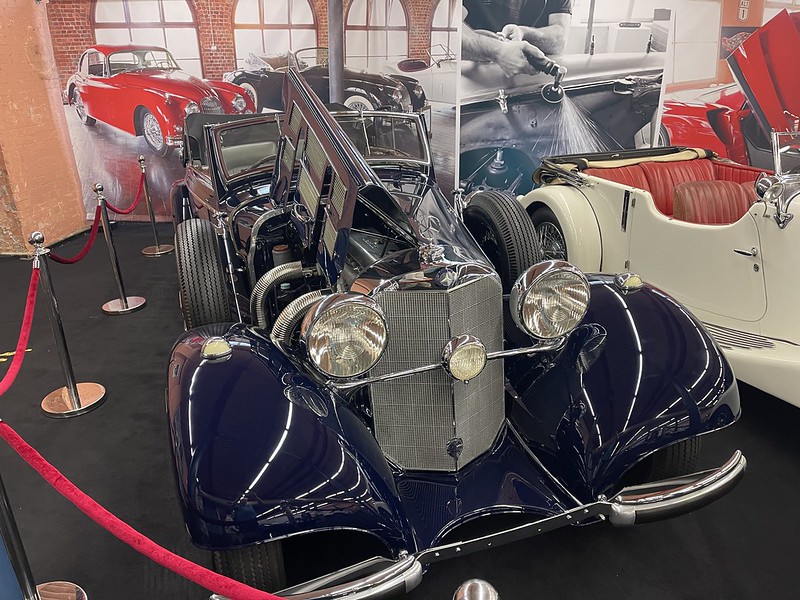
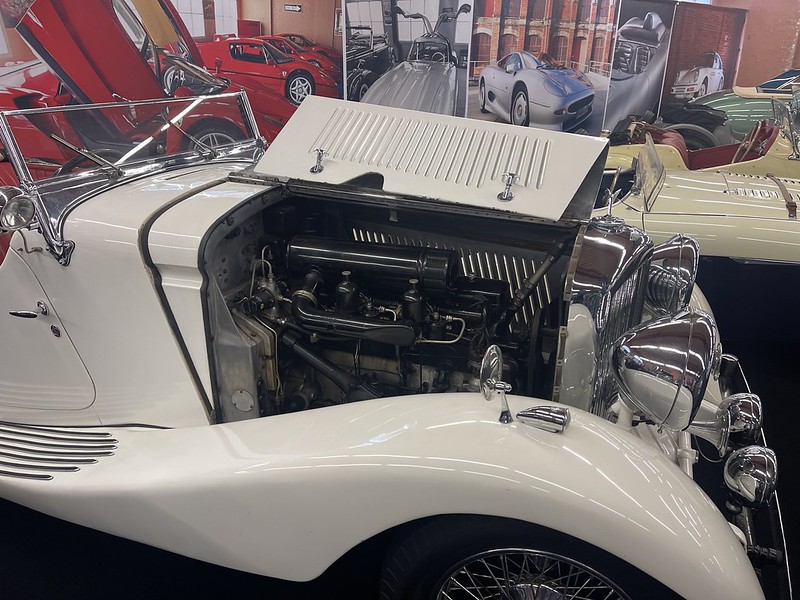
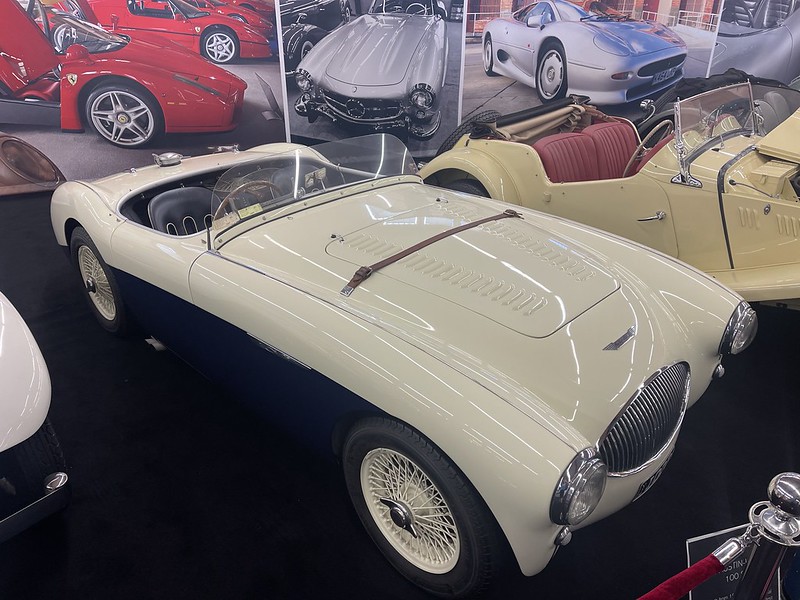
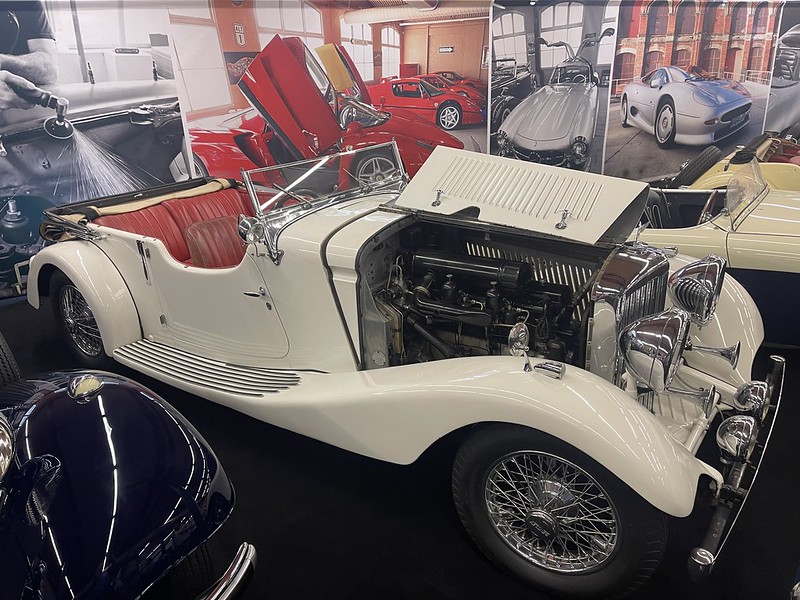
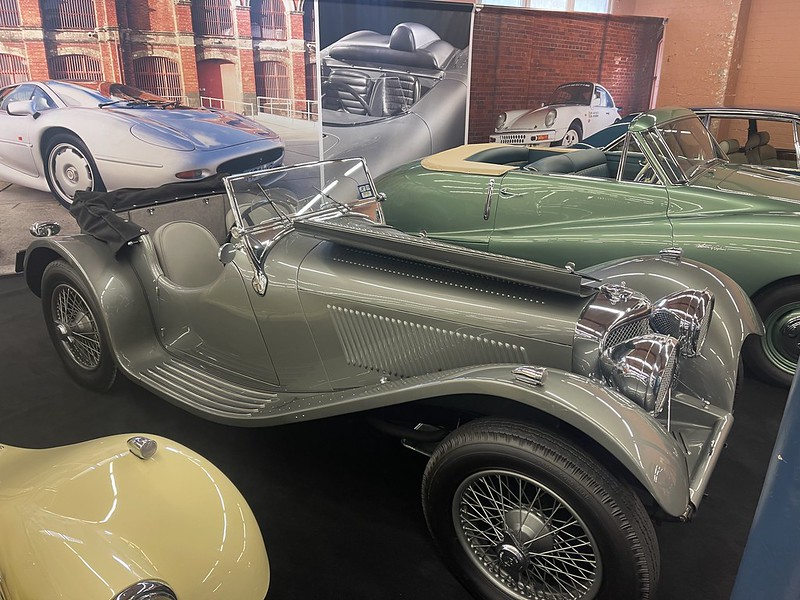
In addition, during the timing chain job, I had the tensioner, guides, and camshaft oiler fittings replaced as per the parts list above. These should always be done at the same time. I’ve wanted to visit the Fox Collection in Melbourne for over 10 years. I used to have a job where I would commute to Melbourne twice a month but the opening hours never lined up with when I was there. This weekend I am traveling through Melbourne and happened to have the Saturday morning fee. I went along for the morning with my kids. The Fox Collection is a part of the personal collection of Lindsay Fox, an Australian trucking magnate. Lindsay Fox is now 87, and has been collecting these cars for years. As well as the public part of the collection, there are apparently another 300 or so cars out near Essendon Airport. The collection is housed in a heritage warehouse in the Melbourne Docklands area. This makes it very easy to get to. There is also plenty of parking if you are a local. The collection is housed over two floors. On the ground floor, there is a general room with high end cars on one side, and performance cars on the other. There are also a couple of trucks from the early years of Mr Fox’s trucking empire. 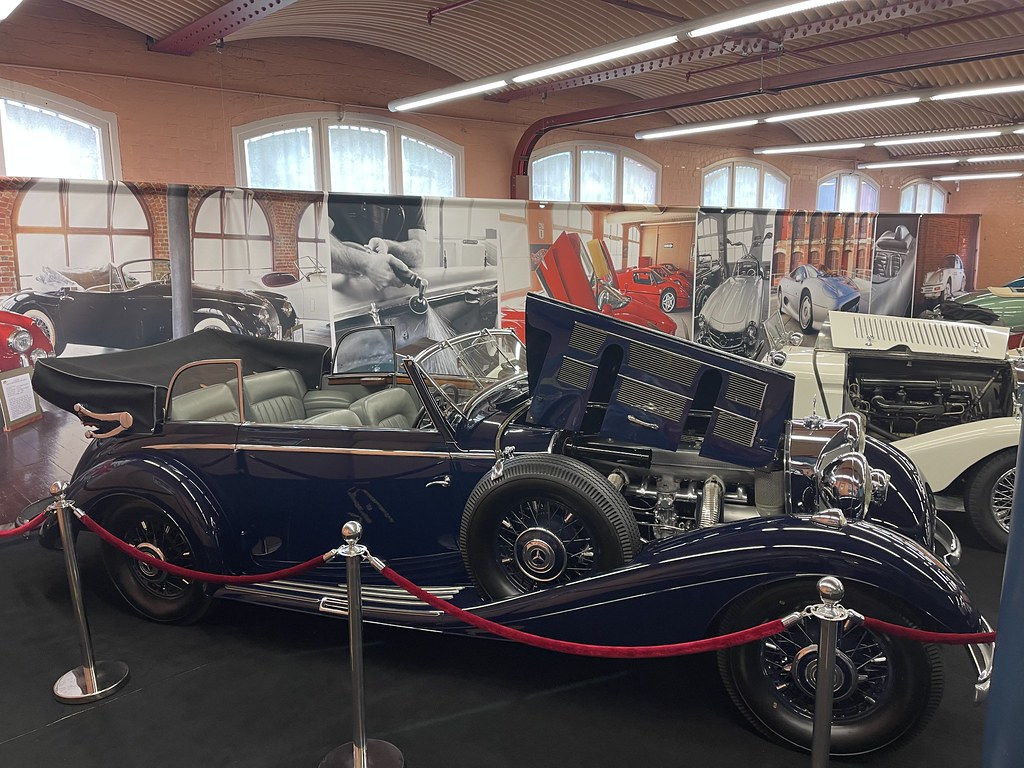
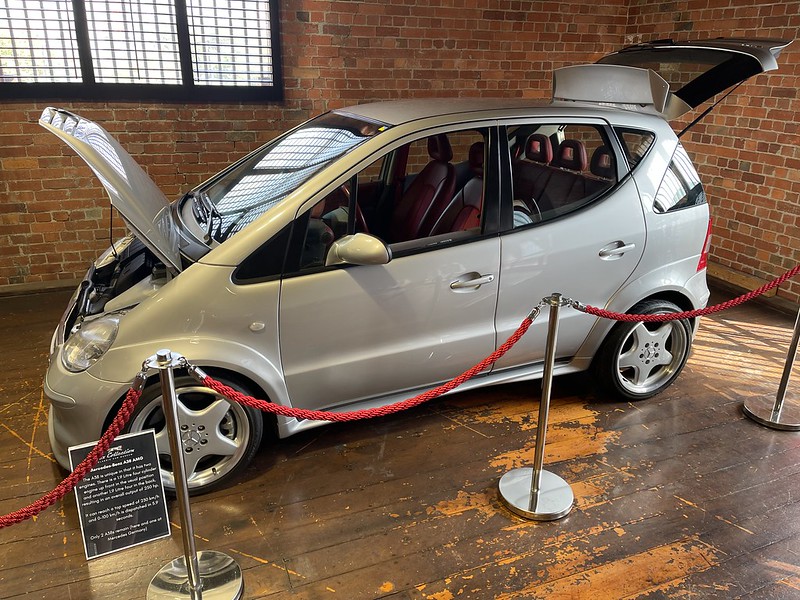
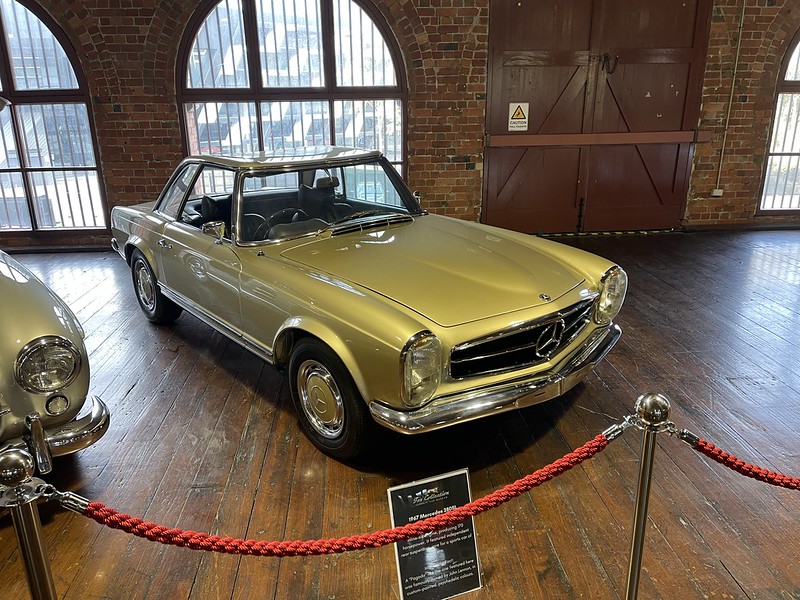
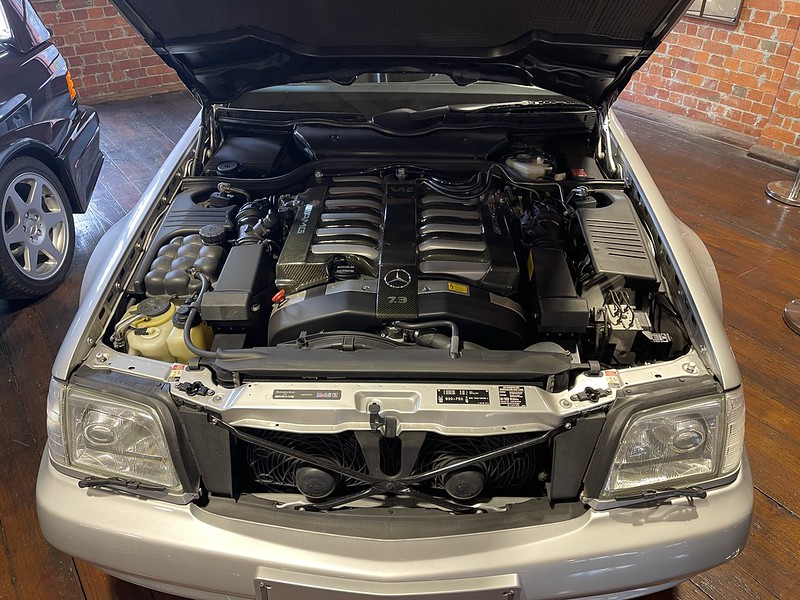
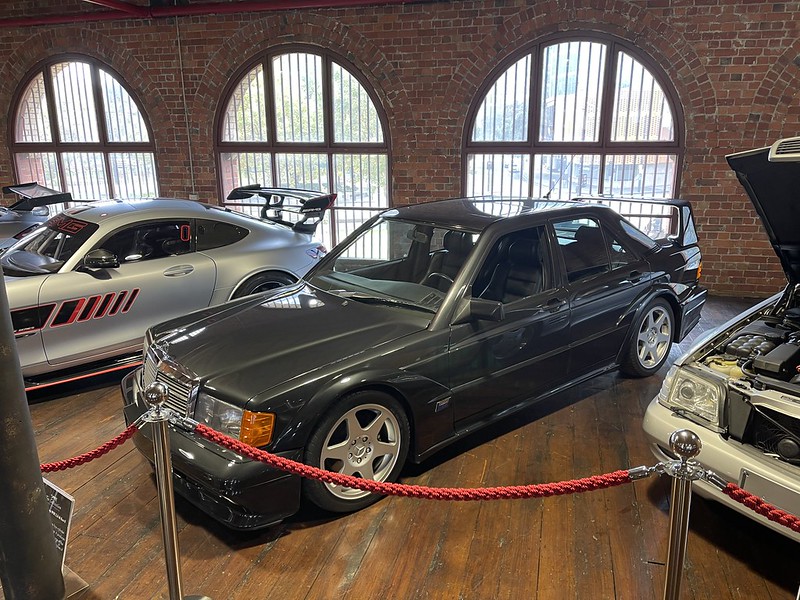
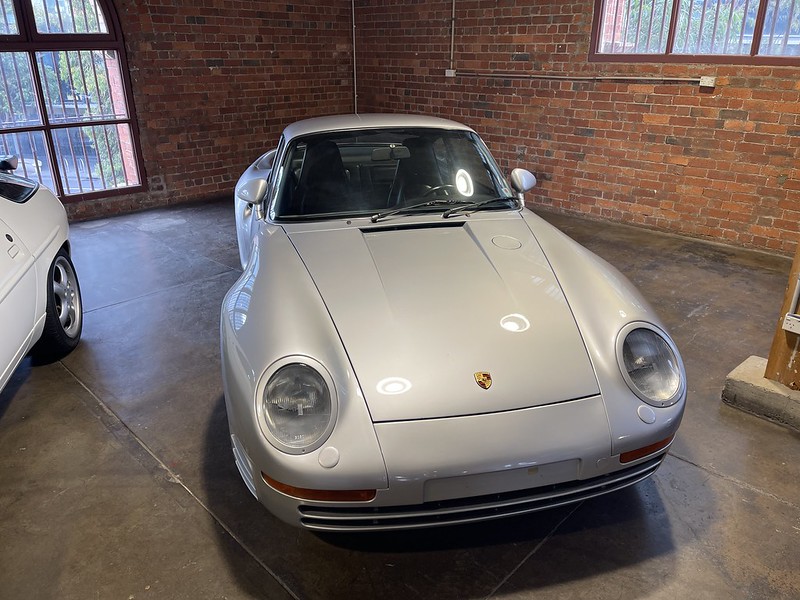
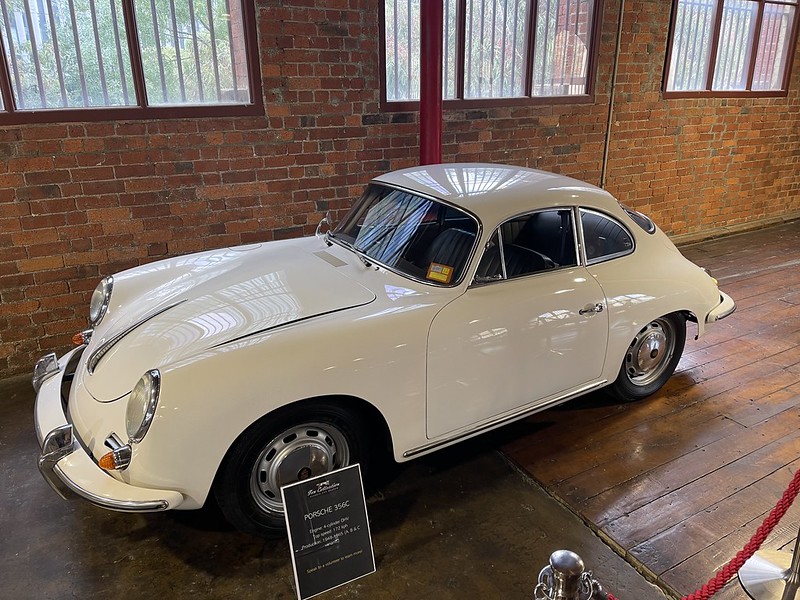
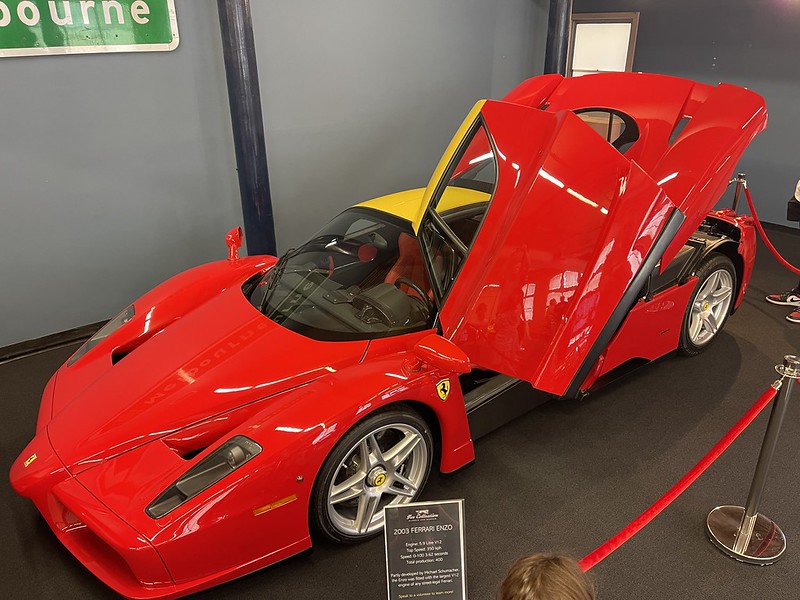
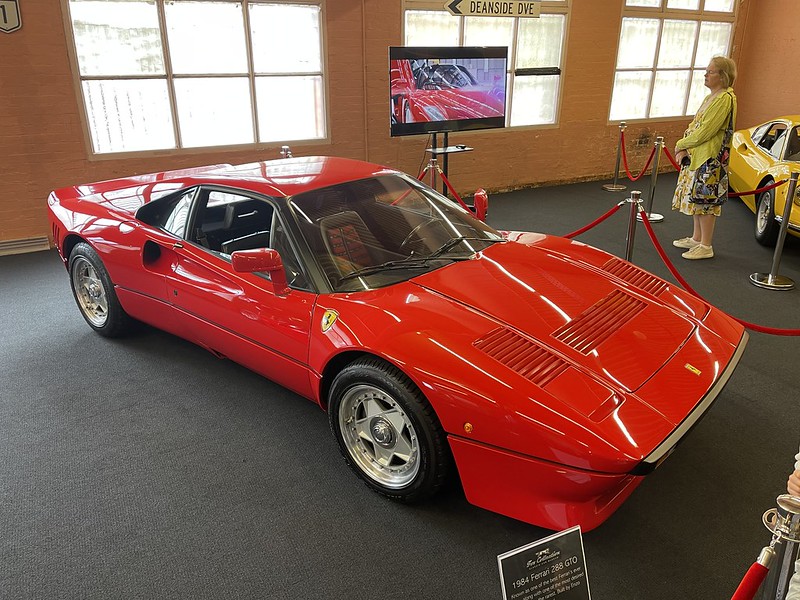
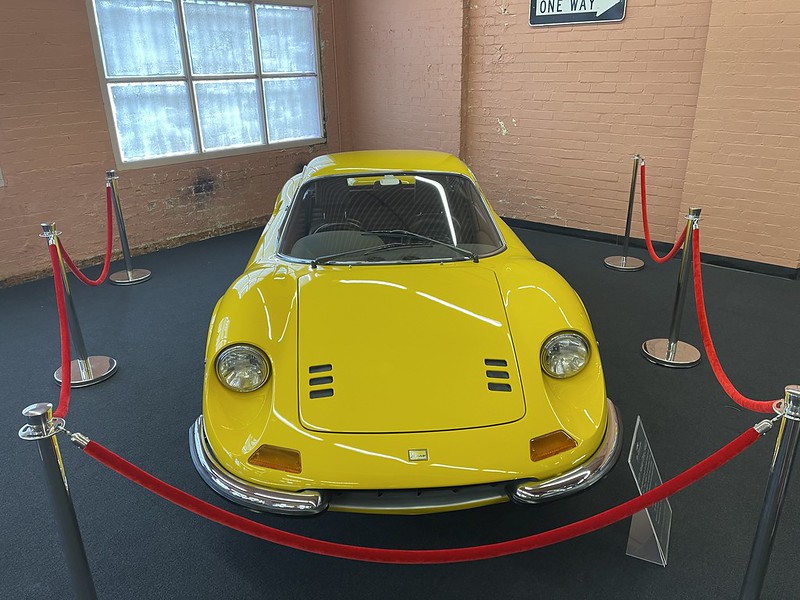
Additionally on the ground floor is the Ferrari Room. Upstairs there is a Mercedes-Benz room and a Porsche Room. Nearly all the cars are pretty special. In the general room you have cars like a Mercedes-Benz 540K Roadster (my favourite) along with an Derby Bentley and an Austin Healy 100S. The room also contains the only remaining Rolls Royce Camarge prototype. The Ferrari room contained an F40, F50, Enzo, 288GTO and a 246Dino. From this room I would take the 288GTO. Its not the most valuable, but the one I would like to drive. That assumes I would fit in. Upstairs the Porsche room has a collection of rare 356s as well as some other interesting cars from Porsche’s heritage and a few modern sports cars. In the Mercedes Benz room there is a Gullwing, a Pagoda, 190SL plus some very rare performance cars like a McLaren Mercedes, SL73, SLR and others. There is also one of only two AMG A38 cars, a twin engine version of the little city car. I would take the Gullwing. I enjoyed the Museum. About an hour is all you really need. The museum focuses on quality rather than quantity. Still, given there are around 300 extra cars, I think the could easily fit another 10-20 cars in the space at the docklands which would be a useful improvement to the museum. Regardless I would recommend the museum if you have an hour or so free in Melbourne on a Saturday morning or Thursday. One of my favourite day trip drive near Sydney is the Oberon to Goulburn Drive. I’ve done this drive in both directions and its a great mix of different roads, plus limited traffic. I even incorporated this road in my recent trip to Melborne. I had also seen that the parallel road that goes south out of Bathurst was also paved in the last 10 years. This road head south until it hits Crookwell, where you can either keep going south to Gunning, or veer off to Goulburn. 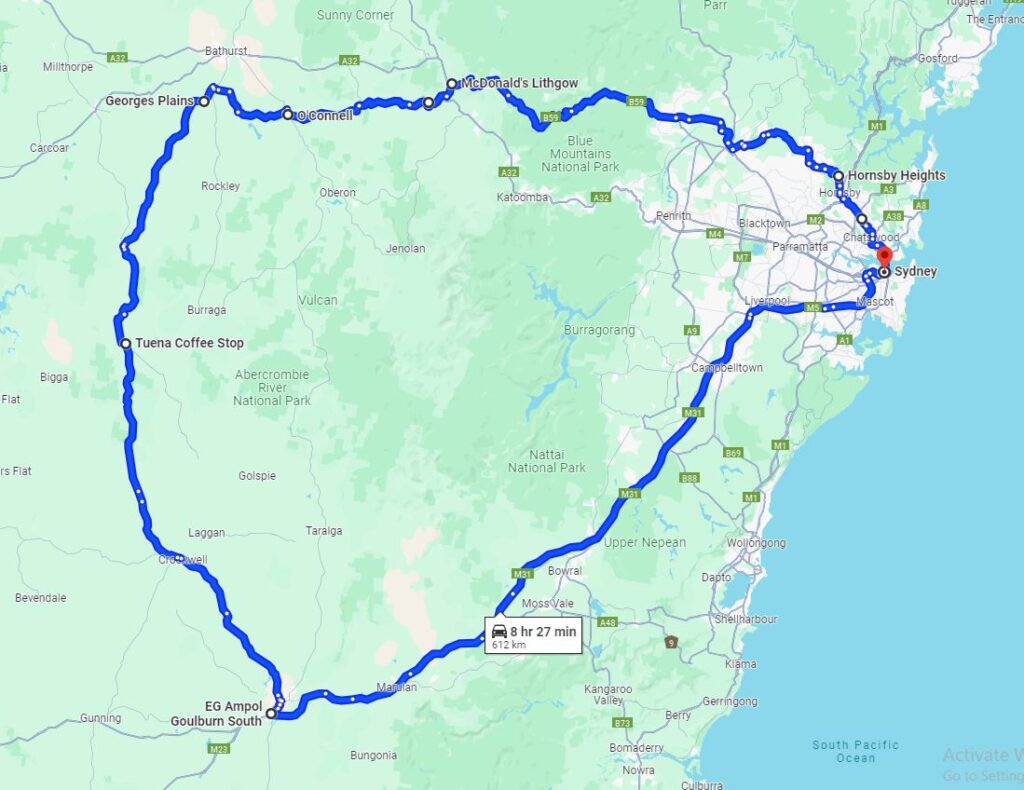
I wanted to try this as another full day trip from Sydney, as well as have it as a candidate as part of bigger road trips. I had a full day free, so I got a small group of friends together and we went and tried it out. We met at McDonalds Lithgow. I took the back way there, via Galston Gorge, Maraylya and Bells Line of Road. This is a pretty good drive in itself and far better than the obnoxious Great Western Highway. We had three cars on our drive, my 560SEC a 380SEC and a W211. 
From Lithgow, we left the main roads and headed towards Lake Lyell. This was quite a scenic spot and we continued past it towards O’Connell. Parts of this road were good and other parts were full of large potholes. We past the turn offs to Oberon which would have taken us on the normal road to Goulburn. We continued along towards George’s plain before heading south towards Tuena. The main part of the road south was pretty good. There was minimal traffic and it was quite scenic. We stopped for Lunch at the little coffee shop at Tuna before heading south towards Crookwell and Goulburn. We all really enjoyed the drive. If I had to pick, I would probably rate the Oberon – Goulburn road slightly better. However, the combination of both allows for an interesting possibility of doing a more adventurous day trip of avoiding the M31 and doing both roads in a single day. It would add another 100km and a few hours to the trip, but I think be worth it with an early start. I was pretty happy with my SEC performed on the trip. The owner of the 380SEC had just replaced his valve seals and that car was running better than ever. The W211 also made the trip without incident. It is probably one of the nicest series 1 W211s left in the country. This month’s night drive was a bit different. Instead of meeting up and doing a drive for 60-90 minutes, we did a very short drive and then went to check out the club library. I’ve been a member of the Mercedes Club for between 10 and 15 years. I knew the club had a library, and I heard it was pretty good, but I had never seen it. As the library was located in the club store room, this felt like a great night drive destination. The night drives are normally attended by around five to ten cars. This is the perfect number to go and check out something like the club library. In addition, the storage facility the club library is located would be largely deserted that late at night. The numbers would be too large to do a day run. 
I picked a month were our normal time was close to a long weekend. With double demerits on, it was a good time to do less driving. We met up at a 7/11 in Macquarie park. This was about a 20 minute drive from the club storage unit. It also allowed us to drive the Comenarra Parkway, one of the better roads in this area of Sydney. On the drive we had two 126s (my 560SEC and a 380SEC) two 123s (a 280CE and a 300D) plus a 108 280SE 3.5 and a 124 230E. Quite a good mix for a drive like this. On the night drives I try to avoid traffic lights and built up areas as its hard to keep the group together. This group of six was about as big as its feasible to do so. 
The drive was fairly uneventful, although we had an incredibly slow SUV in front of us the whole way along the Comenarra parkway. When we got to the club storage facility, we were quite impressed by the Club Library. The library is across four metal cabinets and its been arranged and catalogued at some point. There was a whole cabinet of workshop manuals, another of motoring books, a third one of magazines and Mercedes-Benz Brochures and the final one of club magazine back issues. 
The collection of workshop manuals and books was quite extensive. I could have stayed for a few hours to read. As we checked out the library, it was quickly apparent that the tree I parked under at the 7/11 was a roosting spot for birds as my car was covered in droppings. I had to do a makeshift cleaning job to ensure it didn’t ruin the paint. 
The choice of radio for my 1965 Mercedes 250SE Cabriolet was not an easy one. I don’t know what radio the car had in it’s early years. It is a diplomat delivery car, that was picked up from the factory in Stuttgart. The original radio would have either been a slimline model, or perhaps a radio delete plate. At some point, some butcher enlarged the opening and fitted a DIN radio. When I purchased the car it had a ghastly 90’s CD player. A few years ago, I removed the 90’s CD player and installed a Becker Tribute Radio. This is a modern radio that looks like an original Becker. However, when the alternator died it presumably damaged this radio and it was never the same. It did very strange things including sometimes running with the car switched off. Since it could drain the battery, I had to remove it. So there was not a gaping hole in the dash for the German car show last year, I quickly installed a Europa II Stereo from my Becker Collection as a temporary solution. The Europa II in question was a mid production radio. From its features it would have likely been manufactured between 1975 to 1977. It made a good temporary solution as it needed a service anyway, and the Europa II being a single piece radio, it was a quick install. After driving around for six months with the Europa II, it was clear that my car was no longer killing radios. It was therefore time for something more permanent. I could not install the correct radio due to the dashboard butchery, but I could install a DIN size Becker radio. In addition a friend suggested I use the knobs off a slimline radio that would match the car better. I ordered a set of those, and while I waited for them to arrive, went about thinking about which radio to install. My first option would have been a lovely Grand Prix mono from 1971. This radio is in superb cosmetic condition and the four band LMKUU markings would have fit in well with the age of the car. However, I would have needed to fit an external amplifier to drive four speakers. In addition, the auto seek ‘wunderbar’ feature is not working on this radio. Next option could have been a very early Becker Mexico. I have one of these from 1972 that could have worked. However a built in cassette isn’t right for a 1965 car since that didn’t come out until 1971. In addition, this early Mexico is a mono radio with a Stereo cassette player. As I wouldn’t have been using the cassette, only the radio, this seemed a worse choice than the Grand Prix Mono. Finally the other option was a Grand Prix Stereo. This was appealing as is a top of the line Stereo radio that seems to make sense for a car like a W111 Cabriolet. I have a couple of these radios, but the early ones need service. By far the best is a 1974 model Grand Prix Stereo I decided to go with this as it was in excellent condition. Being a 1974 model, it had the smaller amp that would be easier to fit, and I had already put the plugs on for the small amp, since that is what is built into the Europa II. I had this radio refurbished, so everything works. I could have used an earlier model, but the early Stereo radios have a balance wheel on the front, but that dates them to 1971-1972. In the photo below, it is sporting its original knobs. The only downside is the Grand Prix Stereo is a two piece radio with a separate amplifier like a Mexico cassette. 
The other Advantage of this radio was that I could plug in an external Bluetooth module into the port that normally would have accepted the external cassette player. This port accepts a Stereo signal. I tested the Bluetooth module on the bench and it works really well. It only interrupts the radio signal when you want to play music via Bluetooth, and it has a hands-free calling function too. In the photo below I am also testing the module in an earlier Becker Grand Prix Stereo. 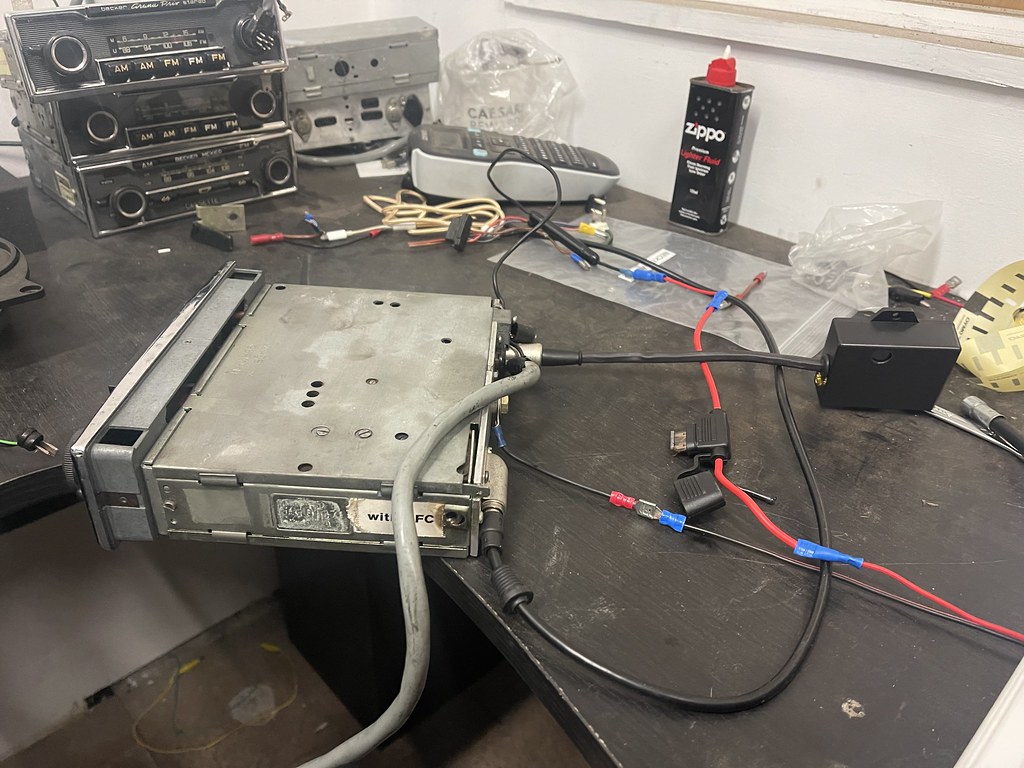
One thing I had noticed from the Europa II was the whine coming from the speakers based on engine RPM. I purchased a radio noise filter from Jaycar to assist with the install. The actual installation was fairly straightforward. The Europa II came out pretty easily. I then wired in the noise filter and the separate amp for the Becker Grand Prix Stereo. I managed to use cable ties to hook the amplifier onto the heater box. The actual installation was fairly straightforward. Switched power and ground went into the noise filter. The noise filter the powered the radio. 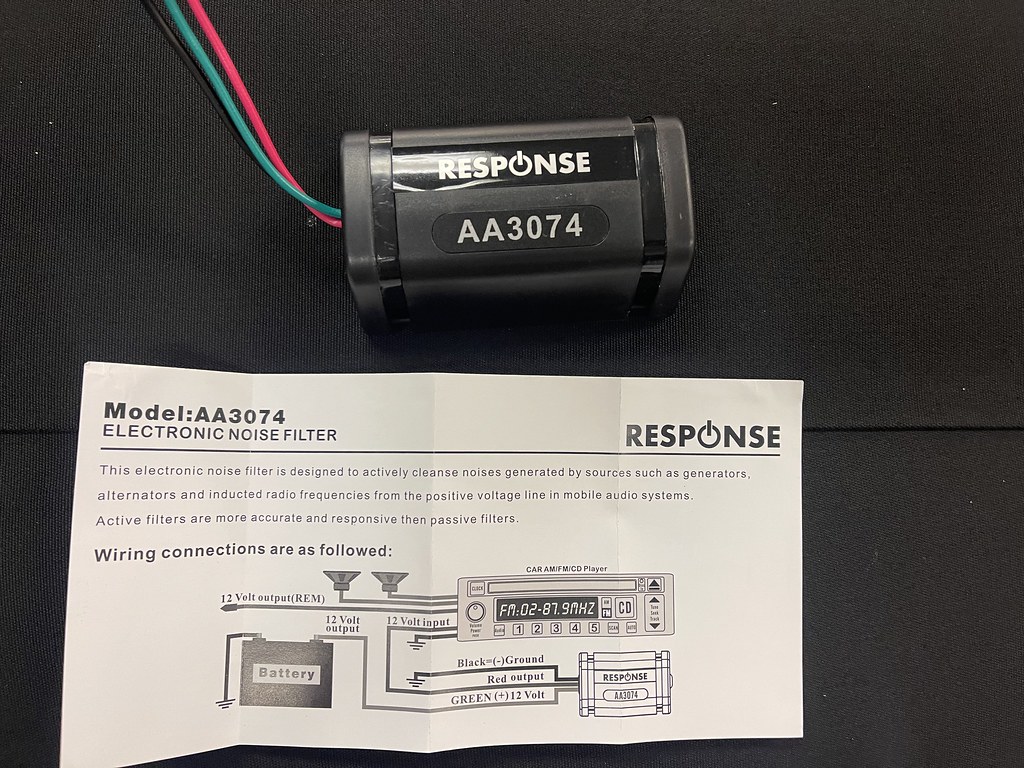
I wouldn’t say the sound is perfect. For better sound I would need to replace speakers and use an external amplifier with a high pass filter like I have in the 560SEC. It does sound reasonable and looks great. The slimline knobs look great but were a pain to get on. Like the knobs on all the early radios they screw on rather than push on. It can be really hard to get the tiny screwdriver in when the radio is installed in the dash. Overall I am really happy with the install and how the radio looks in the dash. The slimline knobs make a huge difference.  < <
My 250SE Cabriolet had a feature I was not aware of. Underneath the injection pump is an oil/coolant heat exchanger. This was also an option on late 230SLs. Instead of a separate cooler that the M130 engined cars have, the heat exchanger helps warm up the oil when the engine is cool and cool it down when the engine is hot. There are lines from the oil filter housing that go to the heat exchanger, as well as coolant lines that come from the side of the block. An example is pictured below. The picture is not my heat exchanger. It is a second hand unit available on eBay. From all I read on the Pagoda forums, the M129 Heat Exchanger is quite effective. The 250SL runs quite cool with it. The heat exchanger is now NLA, but the part number is 000 188 44 01. 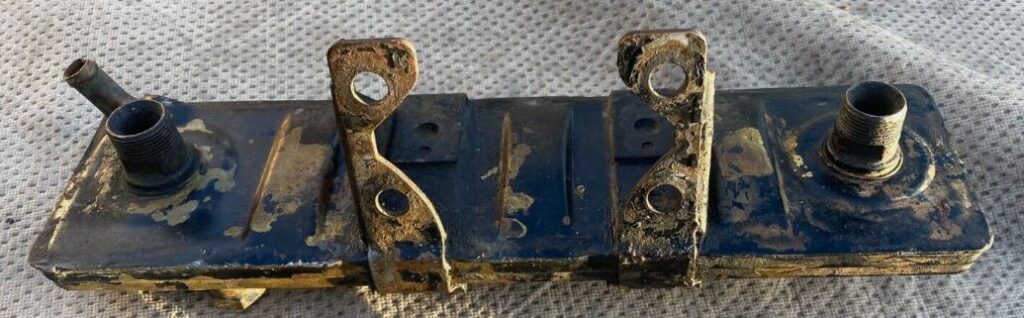
I would have been blissfully unaware of my heat exchanger except for a growing oil leak. The oil leak was coming from the braided flexible oil hose that runs from the far side of the M129 heat exchanger to the oil filter housing. When my mechanic investigated further, he also discovered that the coolant outlet on the engine block was corroded. I started looking up what parts I needed to buy to fix the oil leak and make sure the heat exchanger was working properly. On my car, the longer hose had a short metal section, the braided flexible hose and then another short metal section. But in the EPC this was one hard line. There was no mention of any other system. 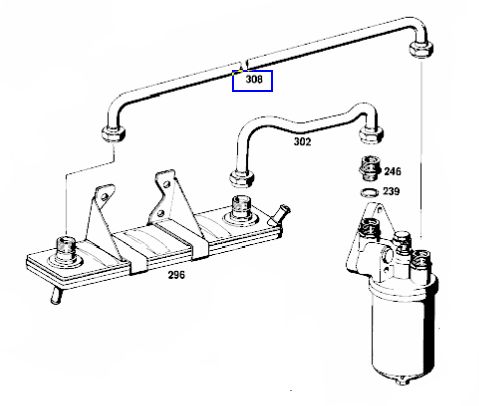
I started doing some further research and I found a post on the W113 forum. It described how in the paper parts manual, there is an earlier setup which had been superseded. The older setup was never brought forward into the EPC. In that section you had the two hard lines (127 180 00 27 & 127 180 02 27) plus the braided line (198 180 01 82). This was replaced by 127 180 03 27 which was the single metal hose. 308 in the diagram above. In case you’re wondering 127 180 01 27 is the shorter hard line for the other outlet of the M129 Heat Exchanger (302). This never changed. While I had the backup of taking the existing braided hose to a hose shop to have the ends re-used for a new hose, I first checked to see what parts were still available. Since the braided house was first used on the 300SL, it is still available. The surrounding hard lines are not, but mine were perfectly fine. Additionally, the replacement part 127 180 03 27 is also still available. Neither were particularly expensive. Both are probably cheaper than having a hose company re-use the ends of my existing braided hose on a new one. I decided to go with the 300SL part. I had a few reasons for this. Firstly, there is very little space around the M129 Heat Exchanger. Getting a flexible hose in and connected with the engine in situ was probably going to be far easier. This was going to save me labour time. Secondly, the parts cost was less than half. Thirdly, I figured the flexible hose had a bit of give in it for vibrations and parts not being perfectly aligned after 60 years. And finally, I liked the idea of having 300SL parts on my car. 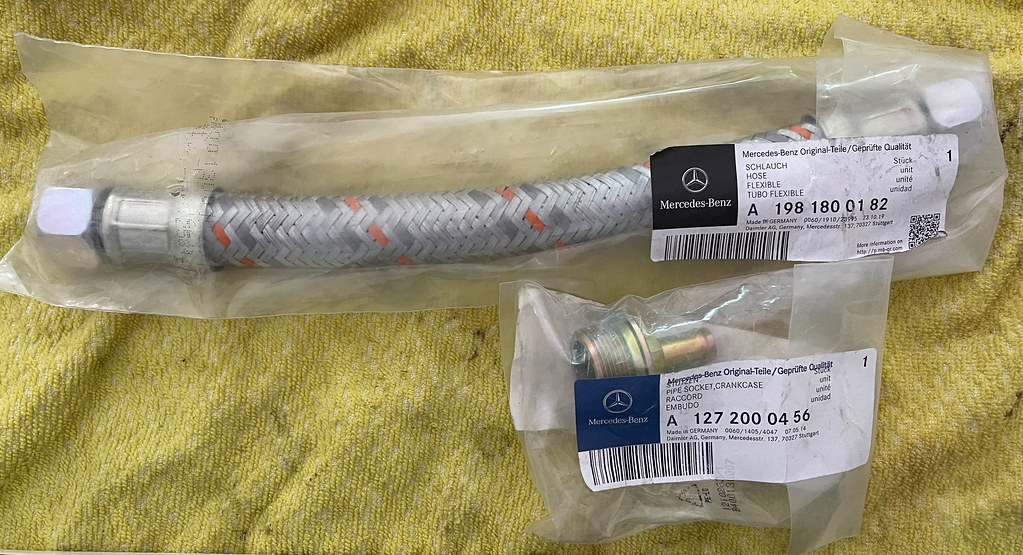
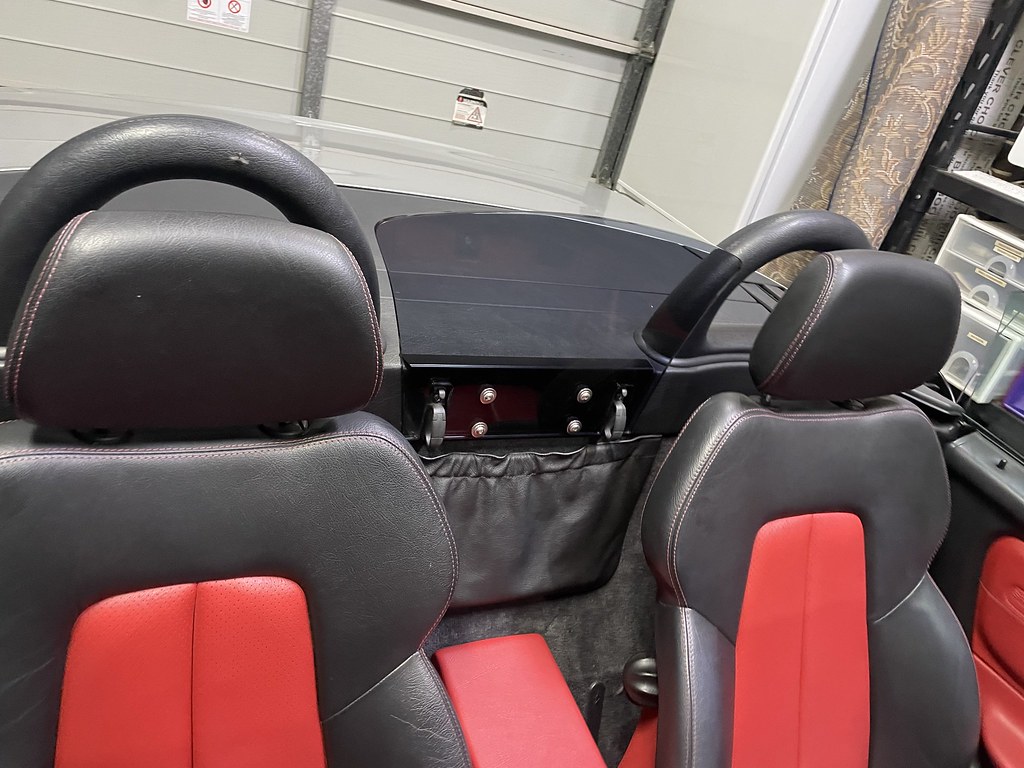
While the car was at the workshop, I had new rear shocks fitted and the power steering pump adjusted so it wasn’t so noisy. My oil leak is gone. I’m also sure the heat exchanger working properly will help the car cool on very hot days. I also learned a lot about a feature of my car I never knew it had. Editors Note: This is part three in a series by Nick Gruzevskis about owning a Modern Mercedes convertible – in this case his R170 SLK230. The first part can be found here and the second part here. There are times when you feel like you’re making progress on a classic car and other times it just feels like you’re procrastinating. As I have just completed an interior, I was feeling positive, so decided to strike while the iron was hot. Since putting the interior back, I’d used the car on freeways several times and noticed the steering wheel shuttering from 90kph and above. I dropped car off to Donnellans, noting that front wheels likely needed a balance. I’d almost completed drinking my latte when I received text message communicating job was complete. First job done. I had been looking into replacing the original fabric wind deflector, not due to its condition, but rather as it was somewhat difficult to see out the rear with the top up. I had viewed the Pippins wind deflector some time ago, with most reviews being positive, but did note there were a few that commented on reflections. 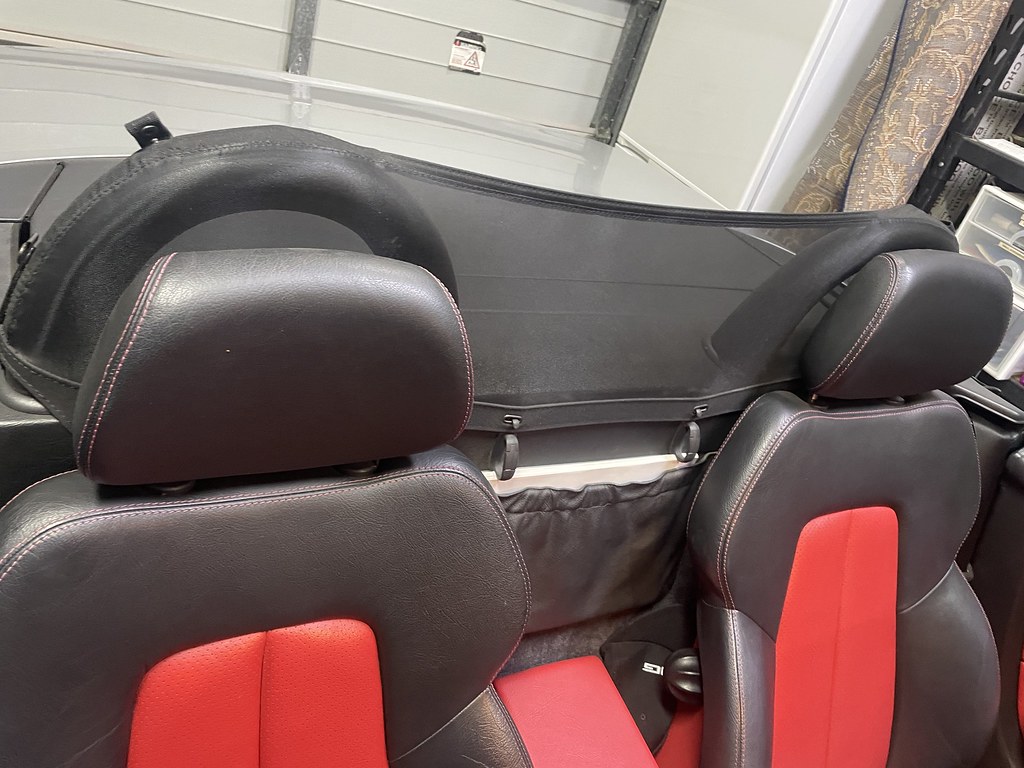
I ordered the R170 wind deflector with roll bar inserts on Feb 22nd and they arrived Mar 3rd, costing $415 AUD including delivery. The wind deflector is 8mm think smoke grey Perspex. You can opt to put a logo or design, but I choose not to do this, as I didn’t want anything impeding my vision. 
The rollbar inserts are made of the same smoke grey Perspex. Installation was quite simple, only tools you need is a Phillips screwdriver, removing the two screws that hold the hooks. It is tricky to install the deflector and put the two hooks back, took me about 30min to complete the job. The roll bar inserts are easier to get in, these just insert from the front of the car, inserting Perspex into top of rollbar, then compressing the roll bar material, pushing it into place. They are securely held in place by pressure/friction alone. 
Testing for the first time, rear vision is dramatically improved. I’m not sure if wind buffeting , more testing is needed here, but looks a lot cleaner than the fabric deflector. The cons, apart from the cost, you do get some reflections from cars in front of you. It’s not really a deal breaker, just something to be aware of. 
Author: Nick Gruzevskis is a contributor to classicjalopy.com, and the custodian of a great collection of classic and modern cars. Links to some his other articles can be found here | |